
How I Edit Photos For Instagram

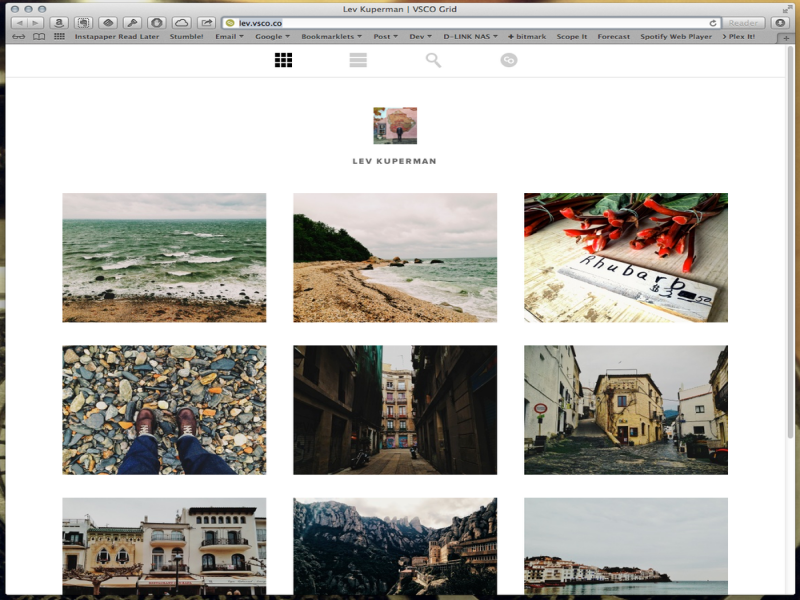
This is my Instagram's feed.
Hello bloggers. Today, I'm happy to share with you, how I edit my photos in Instagram.😁 Many people DM(direct message) me to ask how I edit my photos. "It looks nice and clean. The pictures are cool and blue." Some people asked how I added border to the pictures.
Who wanna follow me on Instagram, just go to @beehaazman19 😉
Tips how I edit my photos in Instagram
Step one: You need to have VSCO apps in your phone. Everything I edit using phone. So, for those who don't have this app yet, download it in PlayStore (for android) or AppStore(for IPhone).


Step three: When you've added photo in VSCO, do click that photo and it will appears like the above sample. So, choose A6 as the filter. I usualy use this filter and HB2 filter. There are a lot of filters you can try. But these two filters that the most I preferred. For the filter A6, you need to invest some of your money to buy this (If I'm not mistaken, I bought this filter for $0.99 about RM5.) Sometimes, it has promotion for 25% or 50%. Do check for that filter. But, this filter can be free if they have new and latest version filter.

Step four: This is the simplest editing tool that I like! It is super easy though. So, what I did? Here is my magic steps!😆 Do adjust all these things.
Exposure: -2
Contrast: -1
Crop: 1:1
Saturation: -1
Fade: -1
Temperature: -2
Just a reminder for you, not all pictures you need to use the same amount of exposure, contrast, saturation and etc. For example, you have two pictures. One is too brighter and the other one is just nice. So, if you still use same exposure for both pictures, the brighter one might be nice but the other one become dim than before. When you posted on Instagram, the pictures will different slightly. Therefore, I used VSCO to edit pictures before I posted them in Instagram because I can preview my pictures' tone as the sample below. If you feel the picture you've edited is not looks alike the next one, keep editing that picture.😉
Step five: If you done, save it with actual size. Then, upload the picture into Snapseed app. Feel free to download this app if you don't have yet.
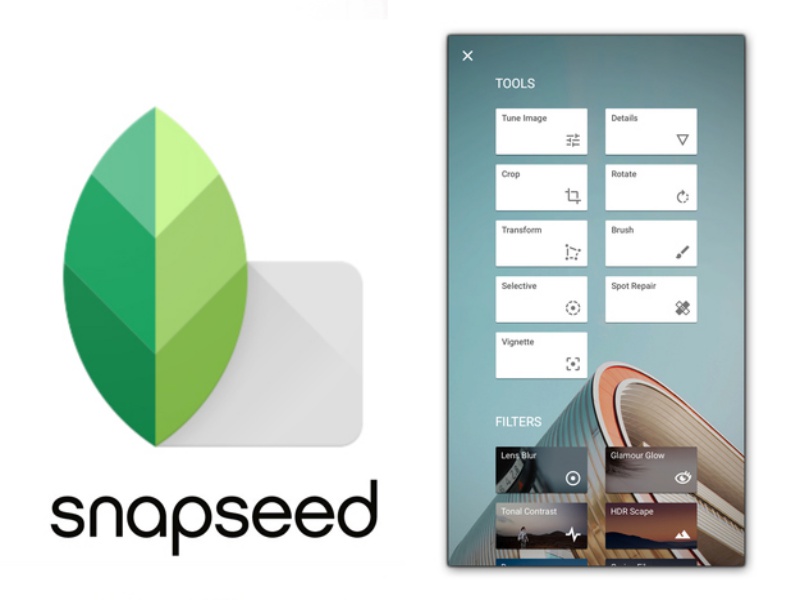
Step six: This is my secret to add border for my pictures. Open the picture you wanted to edit, then click at pencil button at the bottom left in your phone screen. Scroll down until you find Frames filter. Click the filter and adjust the frame until +20 by sliding your finger to the right. Easy right? So, save the photo.
Yeah, you're done. You can post the photo in Instagram!
Hey guys, do subscribes my blog. Any opinions or comments, you can leave it below. ☺
17 Comments
you can also use picsart for the frame :D
ReplyDeleteThank you for the suggestion. :)
DeleteMmg lawa semua ig pict beeha.
ReplyDeletethank you dear. :)
Deletecantikkk. suka tgok feed ig yang lawa2. tp. hhhaha galery manjang gambar berterabur
ReplyDeletestart laa aim satu theme for you IG. ;)
Deletethanks...will try
ReplyDeletewelcome.
DeleteWaaahhh I thought Beeha used Camera ..not phone hahaha
ReplyDeleteGambar yg bawah bawah tu bnyak guna phone. But the latest, I used my camera. :)
Deletejom join GA ni. Dapat gambar polaroid free free je. http://shahirahsarmy.blogspot.my/2017/05/giveaway-july-2017.html
ReplyDeleteMemang semua gambar Beeha guna A6 @ HB2 ke? Siqah nanye kan tak reti guna Vsco. Beli semua filter kot!! Tapi macam pelik je tiap kali guna. Tak pandai edit :D
ReplyDeleteTapi Siqah suka snapseed!! Add Brightness, Yeayy!!
Cepat approve follow request Siqah kat IG :) @haqisfila =)
Done followed you and replied your question. See dm please. ^^
DeleteThank you for the tutorial :) this tutorial is vvery helping me :D
ReplyDeleteMy pleasure, thank you for visiting my blog. :)
DeleteThanks for your great tips to edit photo for instagram.
ReplyDeleteVSCO (Android & iOS)
ReplyDeleteA hugely popular photo editing app amongst Instagram users, VSCO is more than just photo editing, it
offers a community for photographers to connect and create. Simply searching the Hashtag #VSCO on
Instagram will reveal the huge community of photographers and casual users that use VSCO every day, a
testament to the app’s popularity.
VSCO houses all the tools you’d expect from a favourable photo editing app; saturation, highlights,
temperature and vignette can all be adjusted alongside many other settings. VSCO also offers a built in
camera with advanced controls, allowing you to capture the perfect shot, edit and save, all without
leaving the app, an A for convenience. Filters are also a huge feature for VSCO, with the option to buy
filter packs each with their own distinctive styles and tones, very popular amongst users of the app.
Feel free to leave your comment here. Thank you. ;)